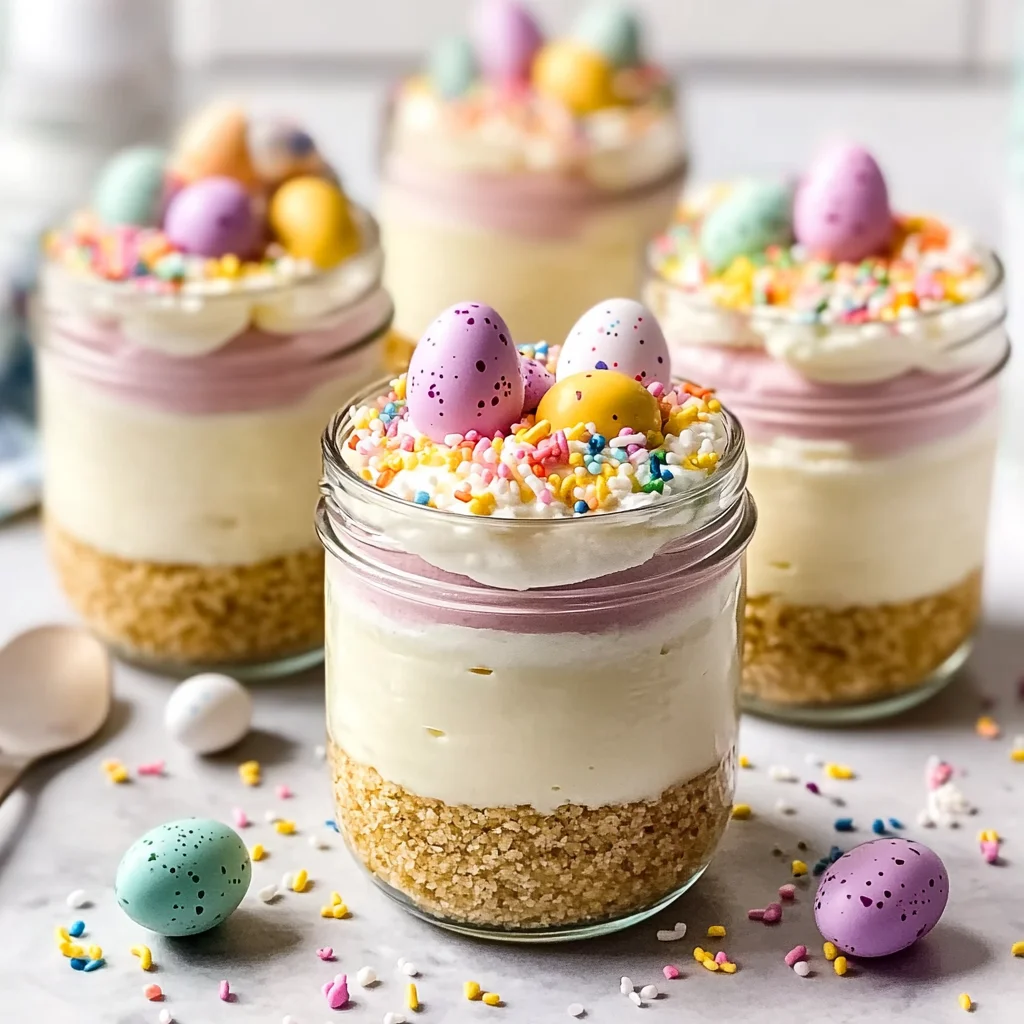
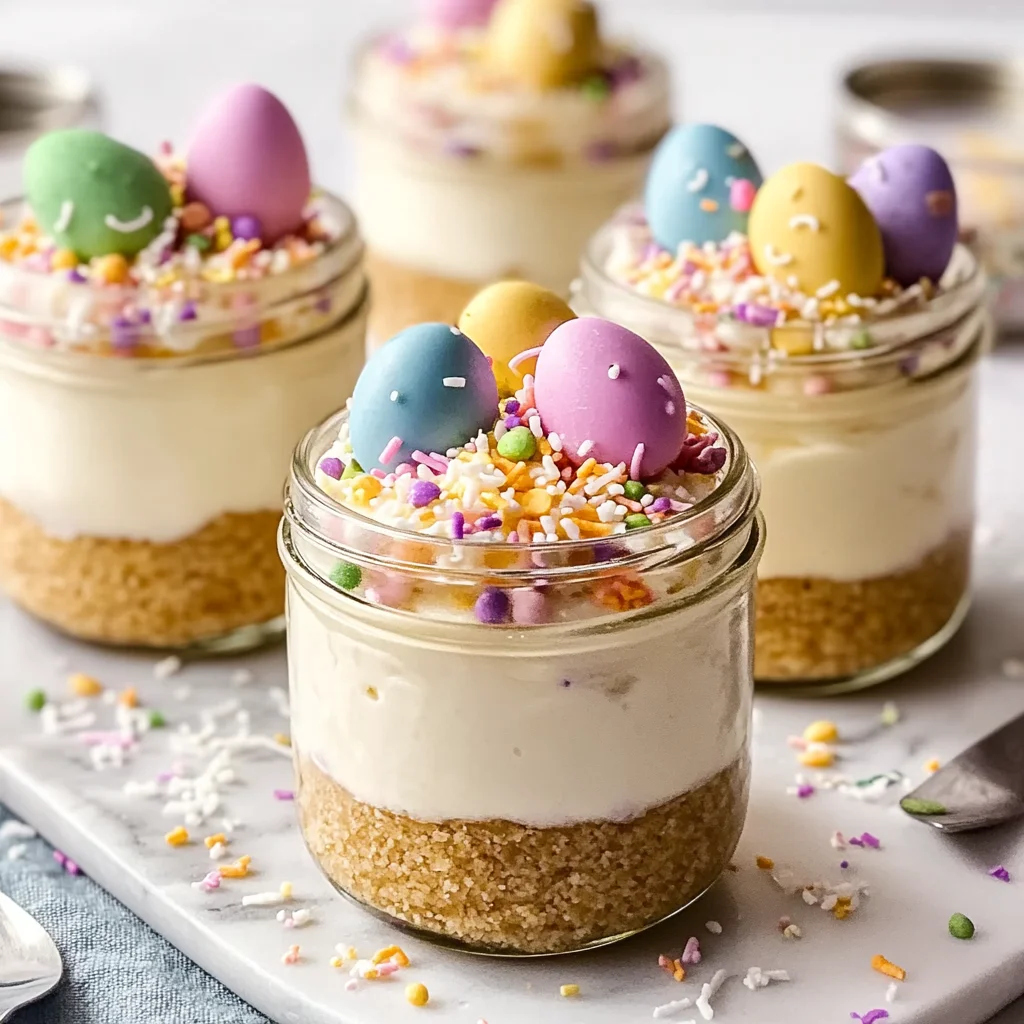
Mini Easter Cheesecake Jars – A Cute, No-Bake Spring Dessert are delightful treats that capture the essence of spring in a jar. These charming desserts are perfect for Easter celebrations, family gatherings, or any occasion where you want to impress your guests with a sweet and creamy delight. The best part? They require no baking, making them easy to whip up even for novice bakers. With their vibrant colors and layered textures, these cheesecake jars will surely bring smiles to everyone who enjoys them.

Jump to:
- Why You’ll Love This Recipe
- Tools and Preparation
- Essential Tools and Equipment
- Importance of Each Tool
- Ingredients
- For the Crust:
- For the Cheesecake Filling:
- Color and Flavor (Optional):
- For Toppings:
- How to Make Mini Easter Cheesecake Jars – A Cute, No-Bake Spring Dessert
- Step 1: Make the Crumb Base
- Step 2: Whip the Cream
- Step 3: Beat the Cream Cheese
- Step 4: Fold it Together
- Step 5: Add Color (Optional)
- Step 6: Fill the Jars
- Step 7: Chill
- Step 8: Decorate
- Step 9: Serve Cold
- How to Serve Mini Easter Cheesecake Jars – A Cute, No-Bake Spring Dessert
- Individual Dessert Cups
- Family Style Platter
- Festive Table Settings
- Pair with Fresh Fruit
- Tea or Coffee Pairing
- Themed Toppers
- How to Perfect Mini Easter Cheesecake Jars – A Cute, No-Bake Spring Dessert
- Best Side Dishes for Mini Easter Cheesecake Jars – A Cute, No-Bake Spring Dessert
- Common Mistakes to Avoid
- Storage & Reheating Instructions
- Refrigerator Storage
- Freezing Mini Easter Cheesecake Jars – A Cute, No-Bake Spring Dessert
- Reheating Mini Easter Cheesecake Jars – A Cute, No-Bake Spring Dessert
- Frequently Asked Questions
- What are Mini Easter Cheesecake Jars?
- How long do I need to chill the Mini Easter Cheesecake Jars?
- Can I customize my Mini Easter Cheesecake Jars?
- What toppings can I use on my cheesecake jars?
- How do I make these cheesecakes more colorful?
- Final Thoughts
- 📖 Recipe Card
Why You’ll Love This Recipe
- No-Bake Convenience: This recipe requires no oven time, making it quick and easy to prepare.
- Perfect for Any Occasion: Ideal for Easter parties, brunches, or just a fun dessert night at home.
- Customizable Flavors: You can add your favorite flavors or colors to make each jar unique.
- Adorable Presentation: These mini jars are visually appealing and perfect for serving at gatherings.
- Kid-Friendly Delight: Kids love the colorful toppings and creamy filling, making them a hit among younger guests.
Tools and Preparation
Before starting on your Mini Easter Cheesecake Jars, gather the essential tools you’ll need. Having everything ready will streamline the process and ensure a smooth preparation.
Essential Tools and Equipment
- Small jars (4–6 oz)
- Mixing bowls
- Hand mixer
- Piping bag or spoon
Importance of Each Tool
- Small jars: Perfect for individual servings; they make the dessert look appealing and easy to serve.
- Hand mixer: Ensures smooth blending of the cream cheese mixture and properly whipped cream for light texture.
- Piping bag or spoon: Allows for neat filling of jars, ensuring an attractive layered effect.
Ingredients
For the Crust:
- 1 1/2 cups graham cracker crumbs (or digestive biscuits)
- 5 tablespoons unsalted butter (melted)
- 2 tablespoons sugar
- Pinch of salt
For the Cheesecake Filling:
- 12 oz cream cheese (softened)
- 1/2 cup powdered sugar
- 1 teaspoon vanilla extract
- 1 tablespoon lemon juice
- 1 cup cold heavy whipping cream
Color and Flavor (Optional):
- A few drops of gel food coloring (pastel shades)
- Lemon zest or almond extract to taste
For Toppings:
- Mini chocolate eggs or jelly beans
- Pastel sprinkles
- Shredded coconut (optional, dyed green for “grass”)
How to Make Mini Easter Cheesecake Jars – A Cute, No-Bake Spring Dessert
Step 1: Make the Crumb Base
- Stir together the graham cracker crumbs, sugar, salt, and melted butter until the mixture resembles wet sand.
- Spoon 2–3 tablespoons into each jar and press down firmly with the back of a spoon. Set aside.
Step 2: Whip the Cream
- In a cold bowl, whip the heavy cream until medium-stiff peaks form.
- Chill while preparing the cheesecake base.
Step 3: Beat the Cream Cheese
- Mix softened cream cheese with powdered sugar, vanilla extract, and lemon juice until smooth and fluffy (about 1–2 minutes).
Step 4: Fold it Together
- Gently fold in the whipped cream into the cream cheese mixture in two additions until no streaks remain.
Step 5: Add Color (Optional)
- If desired, divide the filling into portions and tint with pastel gel colors for that festive spring look.
Step 6: Fill the Jars
- Pipe or spoon the cheesecake filling over each crust in jars, leaving room at the top for toppings.
Step 7: Chill
- Cover each jar with plastic wrap and refrigerate for at least 2 hours or up to 24 hours to set properly.
Step 8: Decorate
- Just before serving, add coconut “grass,” sprinkles, and nestle mini chocolate eggs or jelly beans on top so they remain crisp.
Step 9: Serve Cold
- Hand out with small spoons and enjoy these creamy layers that provide both crunch from the crust and sweetness from toppings!
These Mini Easter Cheesecake Jars are sure to be a hit this season! Enjoy making this cute no-bake spring dessert!
How to Serve Mini Easter Cheesecake Jars – A Cute, No-Bake Spring Dessert
Mini Easter Cheesecake Jars are perfect for any spring gathering. They offer a delightful combination of creamy cheesecake and crunchy crust, making them a hit at parties. Here are some fun serving suggestions to enhance your dessert experience.
Individual Dessert Cups
- Serve each Mini Easter Cheesecake Jar as an individual dessert for guests. This makes it easy for everyone to enjoy without the need for slicing a larger cake.
Family Style Platter
- Arrange several jars on a large platter. This communal style encourages sharing and creates a beautiful display that attracts attention.
Festive Table Settings
- Decorate your table with pastel colors, flowers, and themed decorations. Place the jars strategically among the decor to create an inviting atmosphere.
Pair with Fresh Fruit
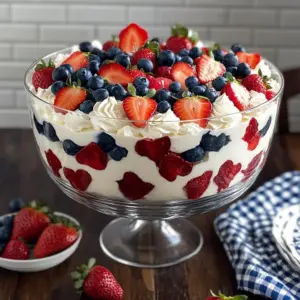
- Serve alongside fresh fruit like strawberries or blueberries. The tartness complements the sweetness of the cheesecake, adding freshness to each bite.
Tea or Coffee Pairing
- Offer tea or coffee as a beverage option. The rich flavors can balance the sweetness of the jars and elevate the dessert experience.
Themed Toppers
- Use different toppings like edible flowers or colored sprinkles to match your event’s theme. This adds a touch of creativity and fun to each jar.
How to Perfect Mini Easter Cheesecake Jars – A Cute, No-Bake Spring Dessert
Creating the perfect Mini Easter Cheesecake Jars requires some attention to detail. Here are key tips to ensure they turn out delicious every time.
- Chill Your Ingredients: Ensure your cream cheese and heavy cream are well-chilled before mixing. This helps achieve a fluffy texture in your cheesecake filling.
- Use Room Temperature Cream Cheese: Softening cream cheese makes it easier to blend smoothly with other ingredients, avoiding clumps in your filling.
- Whip Cream Properly: Whip the heavy cream until it reaches medium-stiff peaks for the best texture. Over-whipping can lead to a grainy filling.
- Taste as You Go: Adjust sweetness or flavor by tasting your filling mixture before piping it into jars. Personalize it according to your preference.
- Layer Creatively: When filling jars, consider layering different colors for visual appeal. This makes each jar unique and attractive.
- Use Airtight Containers: If you plan to prepare these jars ahead of time, store them in airtight containers to maintain freshness while chilling.
Best Side Dishes for Mini Easter Cheesecake Jars – A Cute, No-Bake Spring Dessert
Pairing side dishes with your Mini Easter Cheesecake Jars can create a well-rounded meal experience. Here are some delightful options that complement this sweet treat perfectly.
- Fresh Berry Salad: A mix of strawberries, blueberries, and raspberries dressed in light lemon juice enhances freshness and balances sweetness.
- Spinach Strawberry Salad: Combining spinach with sliced strawberries and almonds offers a refreshing contrast that pairs well with cheesecake.
- Roasted Vegetable Medley: A colorful assortment of roasted seasonal vegetables provides savory flavors that balance out the rich dessert.
- Quinoa Salad: Light and nutritious, quinoa mixed with herbs and citrus dressing adds a healthy touch that complements the sweetness of the cheesecake.
- Mini Vegetable Frittatas: These bite-sized frittatas can be made ahead of time and provide protein-rich options alongside the sweet treats.
- Cucumber Sandwiches: Lightly seasoned cucumber sandwiches on whole grain bread make for refreshing finger food that pairs well with desserts.
- Cheese Platter: Offer a variety of cheeses with crackers for guests who enjoy savory snacks alongside their sweet desserts.
- Caprese Skewers: Cherry tomatoes, mozzarella balls, and basil drizzled with balsamic glaze create an elegant appetizer that enhances any spring gathering.
Common Mistakes to Avoid
When making Mini Easter Cheesecake Jars, it’s easy to make a few common mistakes. Here are some tips to help you achieve the best results.
- Using warm ingredients: Make sure your cream cheese is softened but not warm. Warm cream cheese can lead to a lumpy filling. Let it sit at room temperature for about 30 minutes before mixing.
- Overmixing the filling: Be gentle when folding in the whipped cream. Overmixing can deflate the airiness and make the cheesecake dense. Fold until just combined for a light texture.
- Skipping chilling time: Don’t rush the chilling process! Allow at least two hours for the jars to set properly. This helps the flavors meld and ensures a stable structure.
- Neglecting decoration: Don’t skip on toppings! They add visual appeal and enhance flavor. Get creative with pastel sprinkles or coconut grass to elevate your dessert.
- Not using proper containers: Ensure your jars are clean and dry before filling them. This prevents unwanted flavors or moisture that could affect the cheesecake’s taste.
Storage & Reheating Instructions
Refrigerator Storage
- Store Mini Easter Cheesecake Jars in an airtight container in the fridge.
- They will keep well for up to 5 days, maintaining their creamy texture.
Freezing Mini Easter Cheesecake Jars – A Cute, No-Bake Spring Dessert
- You can freeze these jars for up to 1 month if needed.
- Just be sure to cover them tightly with plastic wrap before placing them in a freezer-safe container.
Reheating Mini Easter Cheesecake Jars – A Cute, No-Bake Spring Dessert
- Oven: Not recommended as this is a no-bake dessert; best enjoyed chilled.
- Microwave: If necessary, use low power in short bursts (10-15 seconds) to slightly soften, but avoid melting.
- Stovetop: Not applicable as these jars should be served cold.
Frequently Asked Questions
What are Mini Easter Cheesecake Jars?
Mini Easter Cheesecake Jars are individual servings of creamy cheesecake layered in small jars, perfect for spring celebrations.
How long do I need to chill the Mini Easter Cheesecake Jars?
You should chill them for at least 2 hours, but they can be refrigerated for up to 24 hours before serving to enhance flavor.
Can I customize my Mini Easter Cheesecake Jars?
Absolutely! Feel free to add different flavorings like almond extract or mix in berries for added color and taste.
What toppings can I use on my cheesecake jars?
You can use mini chocolate eggs, jelly beans, shredded coconut dyed green for grass, or colorful sprinkles!
How do I make these cheesecakes more colorful?
Add a few drops of gel food coloring into the filling before layering it into jars for a festive spring look.
Final Thoughts
Mini Easter Cheesecake Jars – A Cute, No-Bake Spring Dessert are delightful treats that bring joy to any gathering. Their versatility allows you to customize flavors and toppings according to your preference. Give this fun dessert a try; it’s sure to impress your guests!
Did You Enjoy Making This Recipe? Please rate this recipe with ⭐⭐⭐⭐⭐ or leave a comment.
📖 Recipe Card
Print
Mini Easter Cheesecake Jars – A Cute, No-Bake Spring Dessert
- Total Time: 0 hours
- Yield: Makes approximately 6 servings 1x
Description
Mini Easter Cheesecake Jars are the perfect no-bake dessert to celebrate spring! These adorable, colorful treats are easy to make and offer a delightful combination of creamy cheesecake filling layered in small jars over a crunchy graham cracker crust. Whether for an Easter gathering or a fun family night, these individual desserts are sure to impress with their gorgeous presentation and customizable flavors. Featuring vibrant toppings like mini chocolate eggs and pastel sprinkles, they are not just tasty but also visually appealing. Whip them up in no time, and enjoy the smiles they bring!
Ingredients
- 1 1/2 cups graham cracker crumbs
- 5 tablespoons unsalted butter (melted)
- 12 oz cream cheese (softened)
- 1/2 cup powdered sugar
- 1 teaspoon vanilla extract
- 1 tablespoon lemon juice
- 1 cup cold heavy whipping cream
- Optional: A few drops of gel food coloring (pastel shades), lemon zest or almond extract to taste
- For Toppings: Mini chocolate eggs or jelly beans, pastel sprinkles, shredded coconut (optional, dyed green for “grass”)
Instructions
- In a bowl, combine graham cracker crumbs, melted butter, sugar, and salt until crumbly. Press into the bottom of small jars.
- Whip the heavy cream until medium-stiff peaks form and set aside.
- Beat softened cream cheese with powdered sugar, vanilla extract, and lemon juice until fluffy.
- Gently fold whipped cream into the cream cheese mixture until no streaks remain.
- Optional: Divide filling and tint with gel food coloring for vibrant layers.
- Spoon or pipe the cheesecake filling into jars over the crusts and chill for at least 2 hours before serving.
- Decorate with toppings just before serving.
- Prep Time: 30 minutes
- Cook Time: N/A
- Category: Dessert
- Method: No-Bake
- Cuisine: American
Nutrition
- Serving Size: 1 serving
- Calories: 315
- Sugar: 23g
- Sodium: 150mg
- Fat: 24g
- Saturated Fat: 15g
- Unsaturated Fat: 8g
- Trans Fat: 0g
- Carbohydrates: 25g
- Fiber: 1g
- Protein: 3g
- Cholesterol: 65mg