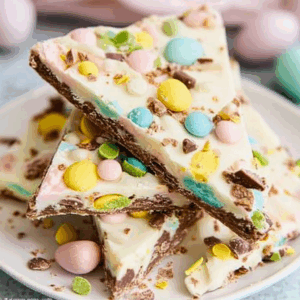
Easter Bunny Bark is a delightful treat that combines fun and flavor in a quick recipe. With its vibrant colors and easy preparation, this candy is perfect for your Easter celebration or any festive gathering. Whether you’re sharing it with family or friends, the charming bunny shapes and sweet taste will surely bring smiles to everyone’s faces.
Jump to:
- Why You’ll Love This Recipe
- Tools and Preparation
- Essential Tools and Equipment
- Importance of Each Tool
- Ingredients
- For the Candy
- How to Make Easter Bunny Bark
- Step 1: Melt the Candy Wafers
- Step 2: Prepare the Bunny Pan
- Step 3: Pipe the Candy Coating
- Step 4: Cool and Remove from Pan
- Step 5: Repeat for Additional Pieces
- How to Serve Easter Bunny Bark
- Individual Treat Bags
- Dessert Platter
- Easter Basket Additions
- Ice Cream Topping
- Party Snack Table
- How to Perfect Easter Bunny Bark
- Best Side Dishes for Easter Bunny Bark
- Common Mistakes to Avoid
- Storage & Reheating Instructions
- Refrigerator Storage
- Freezing Easter Bunny Bark
- Reheating Easter Bunny Bark
- Frequently Asked Questions
- Can I customize my Easter Bunny Bark?
- How long does it take to make Easter Bunny Bark?
- Can I use different colors of candy melts?
- What is the best way to store Easter Bunny Bark?
- Is this recipe suitable for kids?
- Final Thoughts
- 📖 Recipe Card
Why You’ll Love This Recipe
- Quick to Make: With only two main ingredients, you can whip up this fun treat in just 20 minutes.
- Visually Appealing: The pastel colors of the M&M’s make this bark a beautiful addition to your dessert table.
- Customizable: You can easily switch out the M&M’s for other candies or toppings to suit different tastes and occasions.
- Fun for All Ages: Kids will love helping out with the decorating, making it a great family activity.
- Perfect for Gifting: Wrap pieces in clear bags tied with colorful ribbons for thoughtful homemade gifts.
Tools and Preparation
Before diving into the recipe, gather the necessary tools to ensure a smooth and enjoyable cooking experience.
Essential Tools and Equipment
- Easter bunny silicone pan
- Disposable piping bag
Importance of Each Tool
- Easter bunny silicone pan: This versatile pan creates adorable bunny shapes that make your treats festive and fun.
- Disposable piping bag: It helps you easily control the melting wafers when pouring into the mold, ensuring neatness and precision.
Ingredients
To create your delightful Easter Bunny Bark, you’ll need the following ingredients:
For the Candy
- Easter bunny silicone pan
- Disposable piping bag
- 120 pastel colored M&M’s (24 each pink, blue, green, yellow, and purple)
- 2 cups bright white candy melting wafers
How to Make Easter Bunny Bark
Step 1: Melt the Candy Wafers
- Add 1 cup of bright white candy melting wafers to the disposable piping bag.
- Microwave in 1-minute intervals at 50% power until completely melted. Stir between intervals to ensure even melting.
Step 2: Prepare the Bunny Pan
- Place one of each color of pastel M&M’s into each cavity of the bunny silicone pan. Don’t worry about orientation; some can lay flat while others can be on their sides.
Step 3: Pipe the Candy Coating
- Snip off the tip of the piping bag once the candy melts are fully melted.
- Pipe bright white candy melts into each cavity just enough to barely cover the M&M’s.
- Gently tap the pan on your countertop to evenly distribute the candy coating.
Step 4: Cool and Remove from Pan
- Allow the bark to harden completely at room temperature.
- Once set, carefully remove each piece from the silicone pan.
Step 5: Repeat for Additional Pieces
- Repeat steps 1-4 with any remaining melted bright white candy melts and pastel M&M’s until you’ve made all 24 pieces.
Now you have a batch of delicious Easter Bunny Bark ready to enjoy!
How to Serve Easter Bunny Bark
Easter Bunny Bark is a delightful treat that brings festive cheer to your gatherings. Here are some creative ways to serve this sweet delight and make your Easter celebration even more special.
Individual Treat Bags
- Use small, clear treat bags to package individual pieces of Easter Bunny Bark. Tie them with colorful ribbons for a charming presentation.
Dessert Platter
- Arrange the Easter Bunny Bark on a decorative platter alongside other treats. This creates an eye-catching dessert table centerpiece.
Easter Basket Additions
- Place pieces of Easter Bunny Bark in festive baskets filled with grass or shredded paper. These can serve as great gifts or party favors.
Ice Cream Topping
- Crumble the bark into small pieces and use it as a topping for ice cream sundaes. It adds a crunchy texture and vibrant color.
Party Snack Table
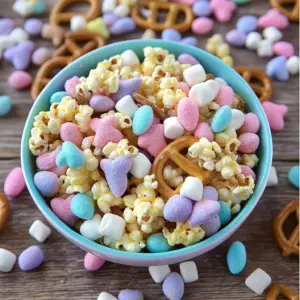
- Include Easter Bunny Bark on your snack table at parties, alongside fruit and popcorn. It’s a fun and colorful addition that will appeal to kids and adults alike.
How to Perfect Easter Bunny Bark
To ensure your Easter Bunny Bark turns out perfectly every time, follow these simple tips for success.
- Use Quality Melting Wafers: Choose high-quality candy melting wafers for the best flavor and smooth melting.
- Microwave in Intervals: Heat the candy melts in 1-minute intervals to prevent burning; this helps achieve a silky consistency.
- Even Distribution: Tap the silicone pan gently after filling it with melts to eliminate air bubbles and ensure an even coating.
- Customize Colors: Feel free to mix different colors of candy melts for a unique look that matches your theme.
- Store Properly: Keep the finished bark in an airtight container at room temperature to maintain its freshness and crunchiness.
Best Side Dishes for Easter Bunny Bark
Pairing side dishes with your Easter Bunny Bark can create a well-rounded dessert experience. Here are some delightful suggestions that complement the sweetness of the bark.
- Fruit Salad: A refreshing mix of seasonal fruits balances the sweetness of the chocolate bark.
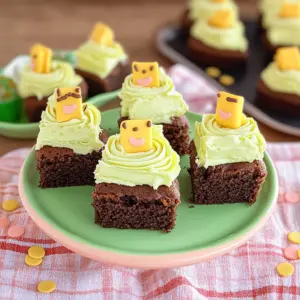
- Mini Carrot Cakes: These bite-sized desserts add a classic Easter flavor while being easy to enjoy.
- Cheese Platter: A selection of cheeses provides savory notes that contrast nicely with the sweet treats.
- Chocolate-Covered Strawberries: These offer an additional sweet option while maintaining a festive aesthetic.
- Lemonade: A cold glass of lemonade adds a refreshing citrus twist to counterbalance the rich flavors of the bark.
- Pistachio Cookies: The nutty flavor complements the sweetness of the bunny bark while providing variety in texture.
Common Mistakes to Avoid
Making Easter Bunny Bark can be simple, but there are a few common mistakes that can affect the outcome. Here’s what to watch out for:
- Using the wrong melting wafers: Not all melting wafers are created equal. Ensure you use high-quality candy melting wafers for the best results.
- Overheating the chocolate: Heating the candy melts at full power can cause them to seize. Always microwave in short intervals at 50% power.
- Not tapping the pan: Failing to tap the pan after filling it can lead to air bubbles. Gently tapping helps distribute the melted coating evenly.
- Ignoring cooling time: Rushing the hardening process can result in a soft texture. Allow adequate time for the bark to set completely before removing it from the mold.
- Skipping clean-up: Leftover melted chocolate can harden and become difficult to clean. Use warm water and soap immediately after piping.
Storage & Reheating Instructions
Refrigerator Storage
- Store Easter Bunny Bark in an airtight container.
- It will stay fresh in the refrigerator for up to 2 weeks.
Freezing Easter Bunny Bark
- Wrap individual pieces in plastic wrap and place them in a freezer-safe bag.
- The bark can be frozen for up to 3 months.
Reheating Easter Bunny Bark
- Oven: Preheat to a low temperature and warm for a few minutes until slightly softened.
- Microwave: Heat on low power in short bursts of 10 seconds, checking frequently.
- Stovetop: Place in a heat-safe dish over simmering water, stirring gently until softened.
Frequently Asked Questions
Here are some common questions about making Easter Bunny Bark:
Can I customize my Easter Bunny Bark?
Yes, you can add different types of candies or toppings based on your preference!
How long does it take to make Easter Bunny Bark?
The total time is about 20 minutes, including preparation and cooling.
Can I use different colors of candy melts?
Absolutely! Feel free to experiment with any colors that suit your occasion or personal taste.
What is the best way to store Easter Bunny Bark?
Store it in an airtight container, either at room temperature or refrigerated.
Is this recipe suitable for kids?
Yes! Making Easter Bunny Bark is a fun activity that kids can help with under supervision.
Final Thoughts
Easter Bunny Bark is not only quick and easy to prepare but also highly customizable, making it perfect for family gatherings and celebrations. You can try different types of candies or color schemes, ensuring each batch is unique. Don’t hesitate—give this delightful treat a try!
Did You Enjoy Making This Recipe? Please rate this recipe with ⭐⭐⭐⭐⭐ or leave a comment.
📖 Recipe Card
Print
Easter Bunny Bark
- Total Time: 20 minutes
- Yield: 24 servings 1x
Description
Easter Bunny Bark is a delightful and visually stunning treat that’s perfect for celebrating spring festivities. With just two main ingredients, you can create these charming, colorful delights that are sure to bring smiles to family and friends. This fun recipe involves melting candy wafers and molding them into adorable bunny shapes, making it a fantastic activity for kids and adults alike. Customize your bark with various candies or toppings to suit any occasion. Whether serving at a festive dessert table, gifting in treat bags, or adding to Easter baskets, this easy-to-make bark will be the highlight of your celebration.
Ingredients
- 120 pastel-colored M&M’s (24 each of pink, blue, green, yellow, and purple)
- 2 cups bright white candy melting wafers
Instructions
- Melt 1 cup of candy melting wafers in a disposable piping bag using the microwave at 50% power in 1-minute intervals until completely smooth.
- Place one of each color M&M into each cavity of an Easter bunny silicone pan.
- Snip the tip of the piping bag and pipe melted candy into each cavity until just covered; tap gently to level.
- Allow the bark to harden at room temperature before removing from the mold.
- Repeat with remaining ingredients to make all 24 pieces.
- Prep Time: 10 minutes
- Cook Time: 10 minutes
- Category: Dessert
- Method: Baking
- Cuisine: American
Nutrition
- Serving Size: 1 serving
- Calories: 100
- Sugar: 10g
- Sodium: 30mg
- Fat: 4g
- Saturated Fat: 2g
- Unsaturated Fat: 2g
- Trans Fat: 0g
- Carbohydrates: 15g
- Fiber: 0g
- Protein: 1g
- Cholesterol: 0mg