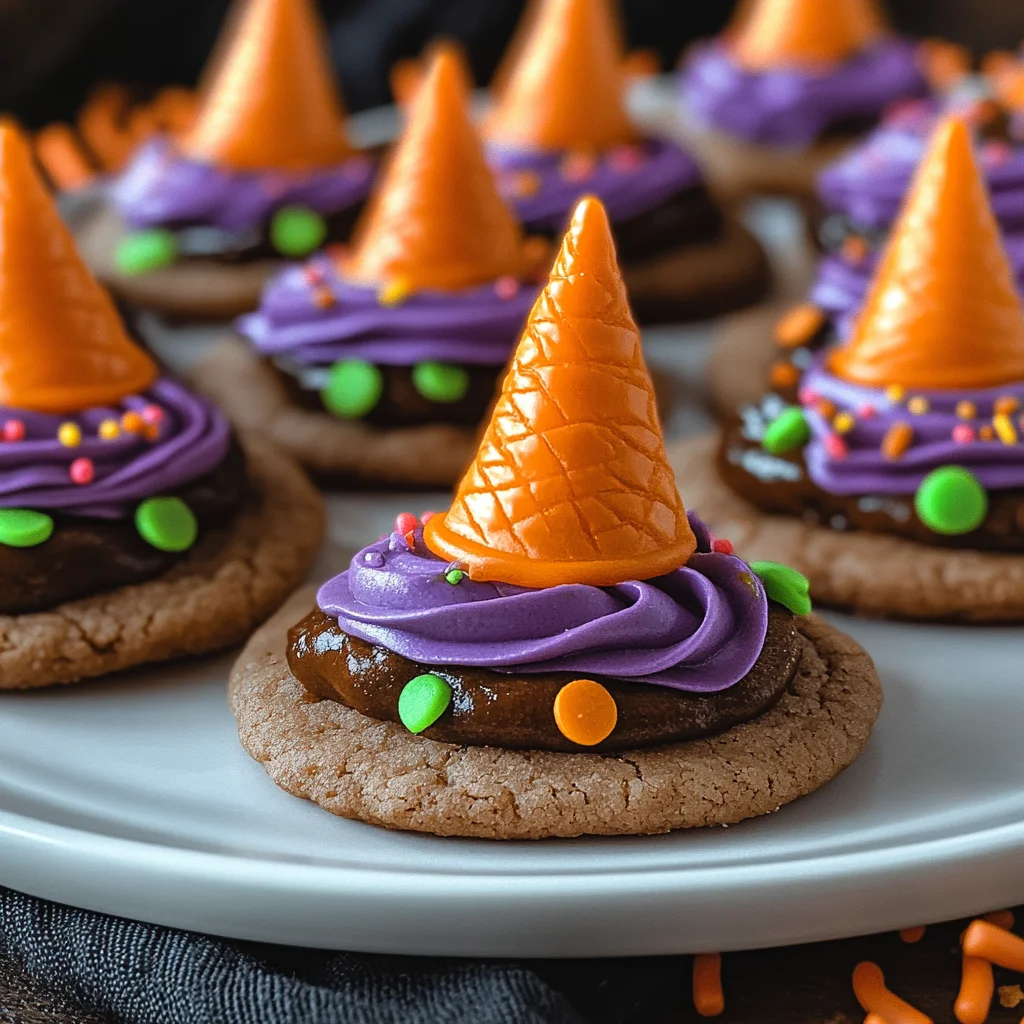
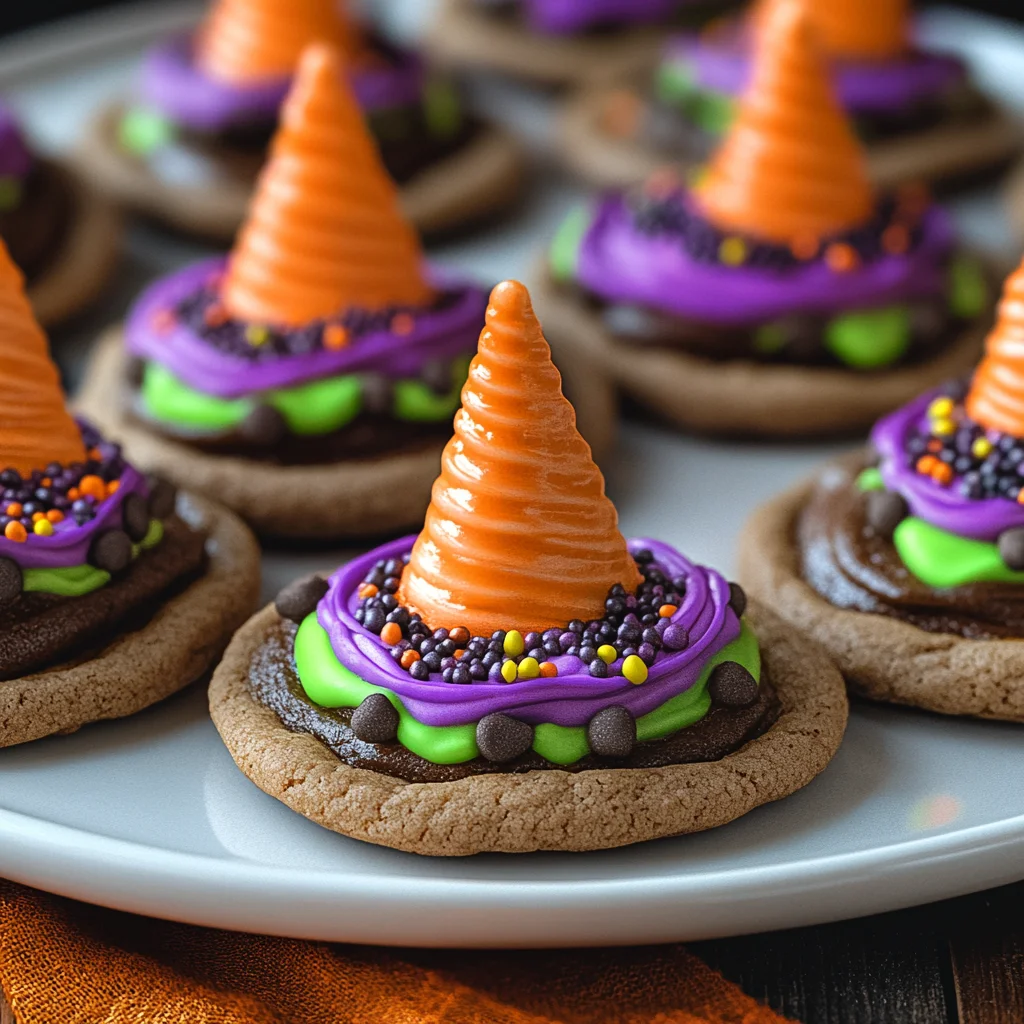
These Halloween Witch Hat Cookies are a delightful treat that will enchant your guests this Halloween. Perfect for parties or family gatherings, these cookies combine fun and creativity, making them an enjoyable project to do with kids. With their chocolaty flavors and colorful icing, they are sure to be the highlight of any spooky celebration.
Jump to:
- Why You’ll Love This Recipe
- Tools and Preparation
- Essential Tools and Equipment
- Importance of Each Tool
- Ingredients
- For the Cake Base
- For the Cookies
- For the Icing Colors
- For Assembly
- How to Make Halloween Witch Hat Cookies
- Step 1: Prepare & Bake the Cones
- Step 2: Spray the Cones
- Step 3: Tint the Icing & Prepare the Bags
- Step 4: Assemble the Witch Hats
- How to Serve Halloween Witch Hat Cookies
- Individual Dessert Plates
- Cookie Stand Display
- Accompanying Beverages
- Treat Bags for Guests
- Themed Table Settings
- How to Perfect Halloween Witch Hat Cookies
- Best Side Dishes for Halloween Witch Hat Cookies
- Common Mistakes to Avoid
- Storage & Reheating Instructions
- Refrigerator Storage
- Freezing Halloween Witch Hat Cookies
- Reheating Halloween Witch Hat Cookies
- Frequently Asked Questions
- How do I make Halloween Witch Hat Cookies gluten-free?
- Can I use different colors for the icing?
- What is the best way to decorate Halloween Witch Hat Cookies?
- How long does it take to make Halloween Witch Hat Cookies?
- Final Thoughts
- 📖 Recipe Card
Why You’ll Love This Recipe
- Family-Friendly Fun: Making these cookies is a great way to spend time with loved ones and create lasting memories.
- Easy to Customize: You can easily change the colors and decorations to match your Halloween theme or personal style.
- Deliciously Chocolatey: The combination of chocolate cookies and cake adds a rich flavor that everyone will adore.
- Perfect for Parties: These eye-catching cookies are sure to impress your guests and spark conversations at any Halloween gathering.
- Quick Assembly: While they look intricate, the assembly process is straightforward, making it accessible for bakers of all levels.
Tools and Preparation
Before you start creating these magical treats, gather your tools. Having everything in place will streamline your baking experience.
Essential Tools and Equipment
- Cupcake Cones Baking Rack
- Cookie Sheet
- Parchment Paper
- Decorating Bags
- Icing Tips (2B, 3)
Importance of Each Tool
- Cupcake Cones Baking Rack: This tool ensures even support for the sugar cones while baking, preventing any tipping or spilling.
- Decorating Bags: These bags allow for precise piping of icing, enabling beautiful designs on each witch hat cookie.
Ingredients
For the Cake Base
- Favorite Cake Mix or Wilton’s Chocolate Cake Recipe
For the Cookies
- Store Bought Chocolate Cookies or Wilton’s Chocolate Cookie Recipe
For the Icing Colors
- Lemon Yellow Icing Color
- Black Color Mist Food Coloring Spray
- Rose Icing Colors Pink Food Coloring
- Violet Icing Color, Gel Food Coloring
- Golden Yellow Icing Color
- Orange Icing Color
For Assembly
- Sugar Cones
- Creamy White Decorator Icing, 4 lb. Tub
How to Make Halloween Witch Hat Cookies
Step 1: Prepare & Bake the Cones
Start by preparing your chosen cake mix according to its instructions. Place the Cupcake Cones Baking Rack on a cookie sheet. Insert sugar cones into the rack and fill each cone with 2 tablespoons of batter. Bake as instructed, then allow them to cool completely.
Step 2: Spray the Cones
Once cooled, carefully trim any excess cake from the top of each cone using a knife if needed. Place them wide side down on parchment paper. Using Black Color Mist, spray each cone generously until fully coated. Allow them to dry for about 10-15 minutes.
Step 3: Tint the Icing & Prepare the Bags
In this step, tint 1 cup of creamy white decorator icing orange. Create purple icing by blending violet and rose colors in another cup. Prepare two decorating bags fitted with tip 2B for orange and purple icings separately. Additionally, tint ¼ cup of creamy white decorator icing yellow by mixing golden yellow and lemon yellow colors; place this in a bag fitted with tip 3.
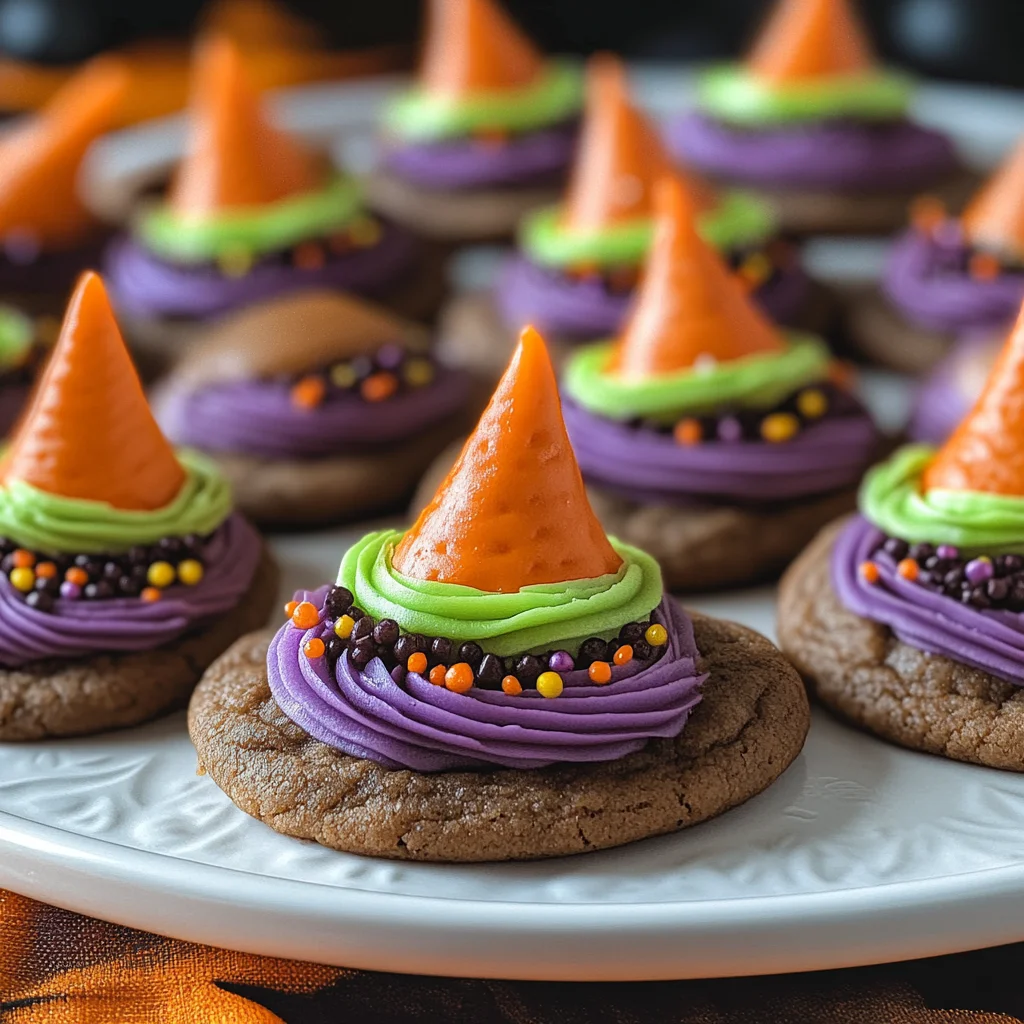
Step 4: Assemble the Witch Hats
To assemble, take an orange icing bag and pipe a small amount in the center of each chocolate cookie before placing a cone on top. Then pipe a band around half of the cones using orange icing and smooth it out with a spatula. Repeat this process with purple icing on the remaining cookies and cones. Allow them to set for about 15-20 minutes. Finally, use yellow icing with tip 3 to pipe a buckle around each hat band. Let them set again for another 15-20 minutes before enjoying your festive treats!
How to Serve Halloween Witch Hat Cookies
These Halloween Witch Hat Cookies are not only delicious but also visually striking, making them a delightful addition to any Halloween gathering. Here are some fun serving suggestions to make the most of these spooky treats.
Individual Dessert Plates
- Serve each cookie on a themed dessert plate for a festive touch. Consider using plates with ghost or pumpkin designs to enhance the Halloween spirit.
Cookie Stand Display
- Arrange the cookies on a tiered cake stand. This creates an eye-catching centerpiece that draws attention and encourages guests to grab a cookie.
Accompanying Beverages
- Pair the cookies with kid-friendly drinks such as apple cider or orange juice served in fun Halloween cups. This adds a refreshing touch to your dessert table.
Treat Bags for Guests
- Place individual cookies in clear treat bags tied with colorful ribbons. This makes for great take-home favors for guests, adding a personal touch to their experience.
Themed Table Settings
- Use Halloween-themed napkins and utensils to complement your cookies. This creates a cohesive look throughout your party and enhances the overall ambiance.
How to Perfect Halloween Witch Hat Cookies
To ensure your Halloween Witch Hat Cookies turn out perfectly, here are some simple tips that can help elevate your baking game.
- Use Fresh Ingredients: Always check the expiration dates on your cake mix and icing colors for the best flavor and vibrant coloring.
- Cool Completely: Make sure the cones cool completely before decorating them. This prevents the icing from melting and helps maintain their shape.
- Practice Piping: Before piping on the actual cookies, practice on parchment paper to get a feel for the pressure needed for consistent designs.
- Store Properly: Keep any leftover cookies in an airtight container at room temperature. This keeps them fresh and tasty for days after your celebration.
- Get Creative: Feel free to customize decorations with additional edible items like sprinkles or candy eyes for added fun!
Best Side Dishes for Halloween Witch Hat Cookies
Pairing side dishes with your Halloween Witch Hat Cookies can create a well-rounded dessert table that delights all ages. Here are some great options:
- Pumpkin Soup: A warm, creamy pumpkin soup is perfect for fall gatherings and complements sweet desserts beautifully.
- Spooky Veggie Platter: Arrange colorful vegetables shaped like ghosts or pumpkins, served with a spooky dip like beet hummus.
- Caramel Apples: Provide caramel-covered apples as a crunchy contrast to the soft cookies, appealing to both kids and adults.
- Ghostly Fruit Salad: Combine seasonal fruits like oranges, grapes, and bananas, adding ghostly marshmallow treats on top for flair.
- Cheese and Crackers: Offer a simple cheese platter with assorted crackers; this savory option balances out the sweetness of the cookies.
- Witch’s Brew Punch: Serve up a bright green punch made with lemon-lime soda and fruit juices, garnished with gummy worms for extra fun.
- Mini Pumpkin Muffins: These bite-sized muffins add another layer of pumpkin flavor that’s perfect for celebrating fall festivities.
- Chocolate-Dipped Pretzels: Sweet and salty chocolate-dipped pretzels create an addictive snack that pairs well with sugary desserts like witch hat cookies.
Common Mistakes to Avoid
Baking Halloween Witch Hat Cookies can be a delightful experience, but avoiding common mistakes will ensure your treats turn out perfectly.
- Misjudging Baking Time: Always keep an eye on the baking time. Overbaking can lead to dry cookies, while underbaking may leave them too soft. Follow your cake mix instructions closely.
- Ignoring Icing Consistency: The icing should be thick enough to hold shape but not so thick that it won’t pipe easily. If it’s too runny, add more powdered sugar; if too thick, add a touch of water.
- Skipping Cooling Steps: Allow the cones and cookies to fully cool before decorating. Decorating warm treats can cause the icing to melt and lose its shape.
- Improper Cone Preparation: Make sure the sugar cones are securely placed into the cupcake rack. If they tip over while baking, they won’t set properly for your witch hats.
- Inconsistent Decoration: Use consistent piping techniques for a uniform look. Practicing on a piece of parchment can help you get the hang of it before decorating your actual cookies.
Storage & Reheating Instructions
Refrigerator Storage
- Store in an airtight container for up to 5 days.
- Layer with parchment paper between cookies to prevent sticking.
Freezing Halloween Witch Hat Cookies
- Freeze in an airtight container for up to 2 months.
- Place parchment paper between layers if stacking.
Reheating Halloween Witch Hat Cookies
- Oven: Preheat oven to 350°F (175°C). Warm cookies for about 5-7 minutes until slightly soft.
- Microwave: Heat individual cookies for about 10-15 seconds on medium power for a quick warm-up.
- Stovetop: Place cookies in a pan on low heat for 1-2 minutes, just until warm.
Frequently Asked Questions
Here are some common questions about making Halloween Witch Hat Cookies.
How do I make Halloween Witch Hat Cookies gluten-free?
You can substitute your favorite gluten-free cake mix in place of regular cake mix. Ensure all other ingredients are also gluten-free.
Can I use different colors for the icing?
Absolutely! Feel free to customize the icing colors based on your theme or preference. Use any gel food coloring you like!
What is the best way to decorate Halloween Witch Hat Cookies?
Use piping bags with different tips for varied designs. Practice on parchment paper first to perfect your technique before applying it to your cookies.
How long does it take to make Halloween Witch Hat Cookies?
The total time is around 105 minutes, including prep and cooling time. It’s a fun project that’s worth every minute!
Final Thoughts
These Halloween Witch Hat Cookies are not only visually appealing but also versatile in flavor and decoration. With endless customization options, you can make them uniquely yours. Gather your family and friends and enjoy creating these delightful treats together!
Did You Enjoy Making This Recipe? Please rate this recipe with ⭐⭐⭐⭐⭐ or leave a comment.
📖 Recipe Card
Print
Halloween Witch Hat Cookies
- Total Time: 55 minutes
- Yield: Approximately 12 cookies
Description
Bring a touch of magic to your Halloween festivities with these delightful Halloween Witch Hat Cookies. Perfect for parties and family gatherings, these whimsical treats combine chocolate cookies, colorful icing, and cake-filled sugar cones to create enchanting witch hats that will mesmerize both kids and adults. The rich chocolaty flavor paired with the creative decorations makes these cookies not only a fun baking project but also a festive centerpiece for any spooky celebration. Whether you’re hosting a Halloween party or looking for a fun activity to do with the kids, these cookies will surely cast a spell on your guests!
Ingredients
- Favorite Cake Mix or Wilton’s Chocolate Cake Recipe
- Store Bought Chocolate Cookies or Wilton's Chocolate Cookie Recipe
- Sugar Cones
- Creamy White Decorator Icing
- Lemon Yellow Icing Color
- Black Color Mist Food Coloring Spray
- Rose Icing Color Pink Food Coloring
- Violet Icing Color, Gel Food Coloring
- Golden Yellow Icing Color
- Orange Icing Color
Instructions
- Prepare cake mix according to package instructions and fill sugar cones with batter. Bake until done and cool completely.
- Trim excess cake from the cones and spray with black color mist. Allow to dry.
- Tint the creamy white icing with desired colors and prepare piping bags.
- Pipe orange icing onto chocolate cookies and place cones on top. Decorate with additional colored icings as desired.
- Prep Time: 30 minutes
- Cook Time: 25 minutes
- Category: Dessert
- Method: Baking
- Cuisine: American
Nutrition
- Serving Size: 1 cookie (35g)
- Calories: 150
- Sugar: 12g
- Sodium: 120mg
- Fat: 6g
- Saturated Fat: 3g
- Unsaturated Fat: 2g
- Trans Fat: 0g
- Carbohydrates: 23g
- Fiber: 1g
- Protein: 2g
- Cholesterol: 0mg