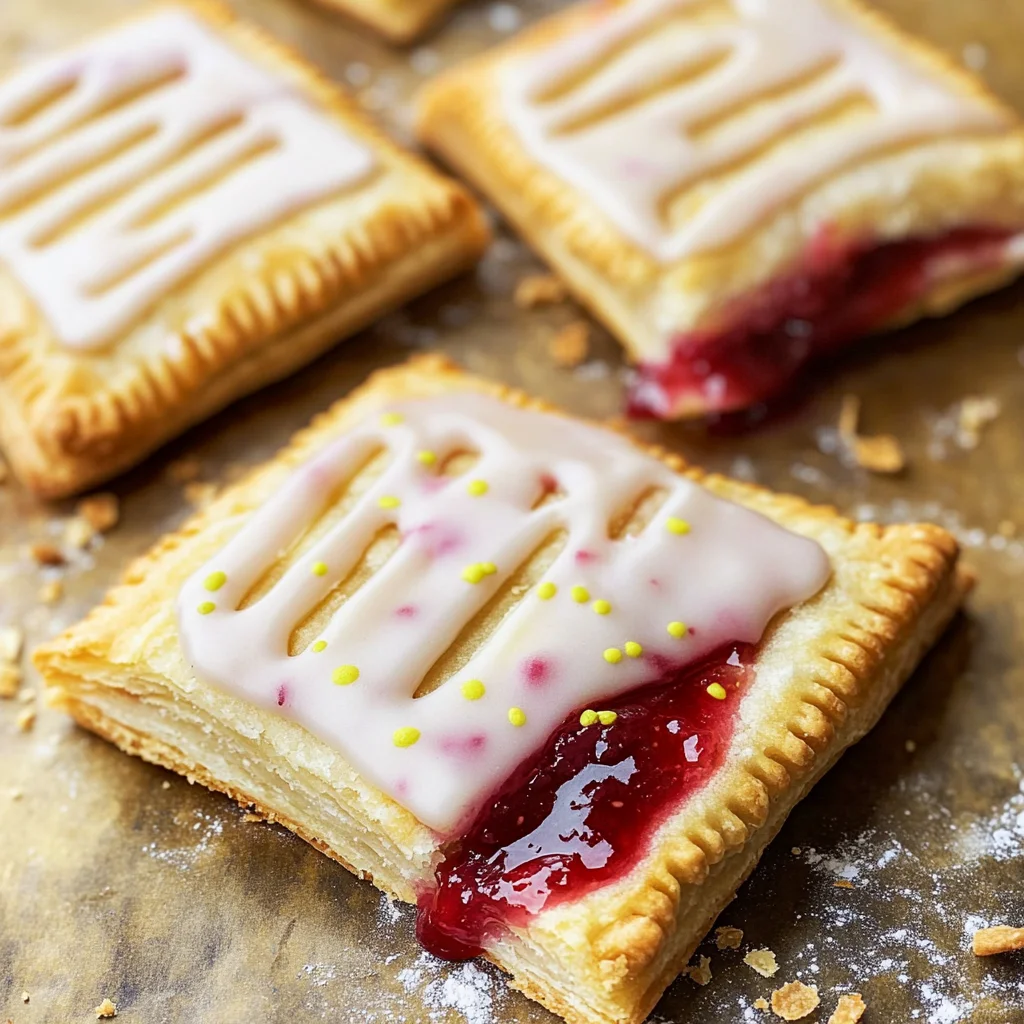
Homemade Gluten-Free Pop Tarts are a delightful treat that captures the nostalgia of childhood breakfasts. These pastries feature a flaky crust filled with sweet strawberry jam and topped with a creamy vanilla glaze, making them perfect for any occasion—from leisurely weekend breakfasts to festive dessert tables. With a simple preparation process and scrumptious flavor, these pop tarts are sure to please everyone.
Jump to:
- Why You’ll Love This Recipe
- Tools and Preparation
- Essential Tools and Equipment
- Importance of Each Tool
- Ingredients
- For the Pastry Dough
- For the Filling
- For the Egg Wash
- For the Glaze
- How to Make Gluten-Free Pop Tarts
- Step 1: Prepare the Dough
- Step 2: Roll Out the Dough
- Step 3: Assemble the Pop Tarts
- Step 4: Bake
- Step 5: Make the Glaze
- How to Serve Gluten-Free Pop Tarts
- Pair with Fresh Fruit
- Enjoy with Coffee or Tea
- Dip in Yogurt
- Top with Ice Cream
- How to Perfect Gluten-Free Pop Tarts
- Best Side Dishes for Gluten-Free Pop Tarts
- Common Mistakes to Avoid
- Storage & Reheating Instructions
- Refrigerator Storage
- Freezing Gluten-Free Pop Tarts
- Reheating Gluten-Free Pop Tarts
- Frequently Asked Questions
- What are Gluten-Free Pop Tarts made of?
- How do I know if my Gluten-Free Pop Tarts are done baking?
- Can I customize my Gluten-Free Pop Tarts?
- How long do homemade Gluten-Free Pop Tarts last?
- Final Thoughts
- 📖 Recipe Card
Why You’ll Love This Recipe
- Easy to Make: This recipe simplifies the process of creating delicious pastries from scratch.
- Delicious Flavor: Each bite offers a buttery, tender texture paired with sweet strawberry goodness.
- Customizable: Feel free to swap out the filling for your favorite jams or even chocolate spreads.
- Perfect for Any Occasion: Whether it’s breakfast or dessert, these pop tarts fit right in.
- Gluten-Free Goodness: Enjoy a classic treat without any gluten, making it accessible for those with dietary needs.
Tools and Preparation
To make your own Gluten-Free Pop Tarts, you’ll need a few essential tools. Gathering everything beforehand will streamline your cooking experience and ensure you have everything at hand.
Essential Tools and Equipment
- Rolling pin
- Pastry cutter or knife
- Baking sheet
- Parchment paper
- Mixing bowls
Importance of Each Tool
- Rolling pin: Helps achieve an even thickness for the pastry, ensuring consistent baking.
- Pastry cutter or knife: Useful for cutting the dough into the perfect rectangular shapes for each pop tart.
- Baking sheet: Provides a stable surface for baking multiple pop tarts at once.
- Parchment paper: Prevents sticking and makes cleanup easier after baking.
Ingredients
For the Pastry Dough
- 2 3/4 cup gluten-free all-purpose rice flour blend with xanthan gum
- 1/4 cup granulated sugar
- 1/2 teaspoon salt
- 1/2 cup very cold unsalted butter (dairy-free use Smart Balance butter)
- 1/2 cup very cold shortening
For the Filling
- 16 teaspoon gluten-free seedless strawberry jam
For the Egg Wash
- 1 large egg
- 1 tablespoon water
For the Glaze
- 1 cup powdered sugar
- 1/4 teaspoon pure vanilla extract
- 2 tablespoons water
How to Make Gluten-Free Pop Tarts
Step 1: Prepare the Dough
- In a large mixing bowl, combine the gluten-free flour, sugar, and salt.
- Cut in the cold butter and shortening using a pastry cutter until crumbly.
- In a separate bowl, whisk together eggs and apple cider vinegar. Add this mixture to the flour mix.
- Gradually add ice-cold water until a dough forms. Chill in the refrigerator for at least 30 minutes.
Step 2: Roll Out the Dough
- Preheat your oven to 375°F (190°C).
- On a floured surface, roll out half of the chilled dough to about 1/8-inch thickness.
- Cut into rectangular shapes (about 3×5 inches) using your pastry cutter or knife.
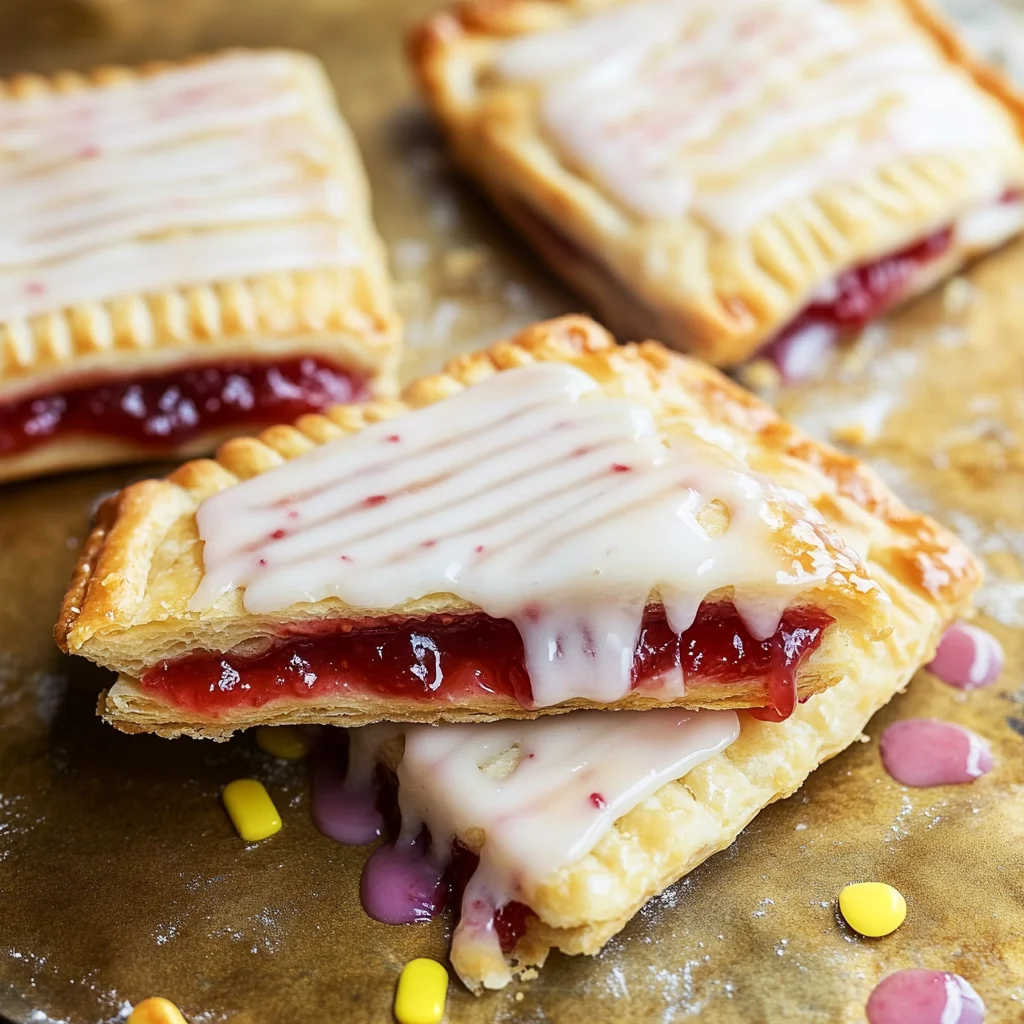
Step 3: Assemble the Pop Tarts
- Place about 2 teaspoons of strawberry jam in the center of half of your rectangles.
- Moisten edges with egg wash; place another rectangle on top and press down gently to seal.
- Use a fork to crimp edges for added decoration and sealing.
Step 4: Bake
- Arrange on a baking sheet lined with parchment paper.
- Brush tops with remaining egg wash and cut small slits in each pastry for steam to escape.
- Bake for 20 minutes or until golden brown.
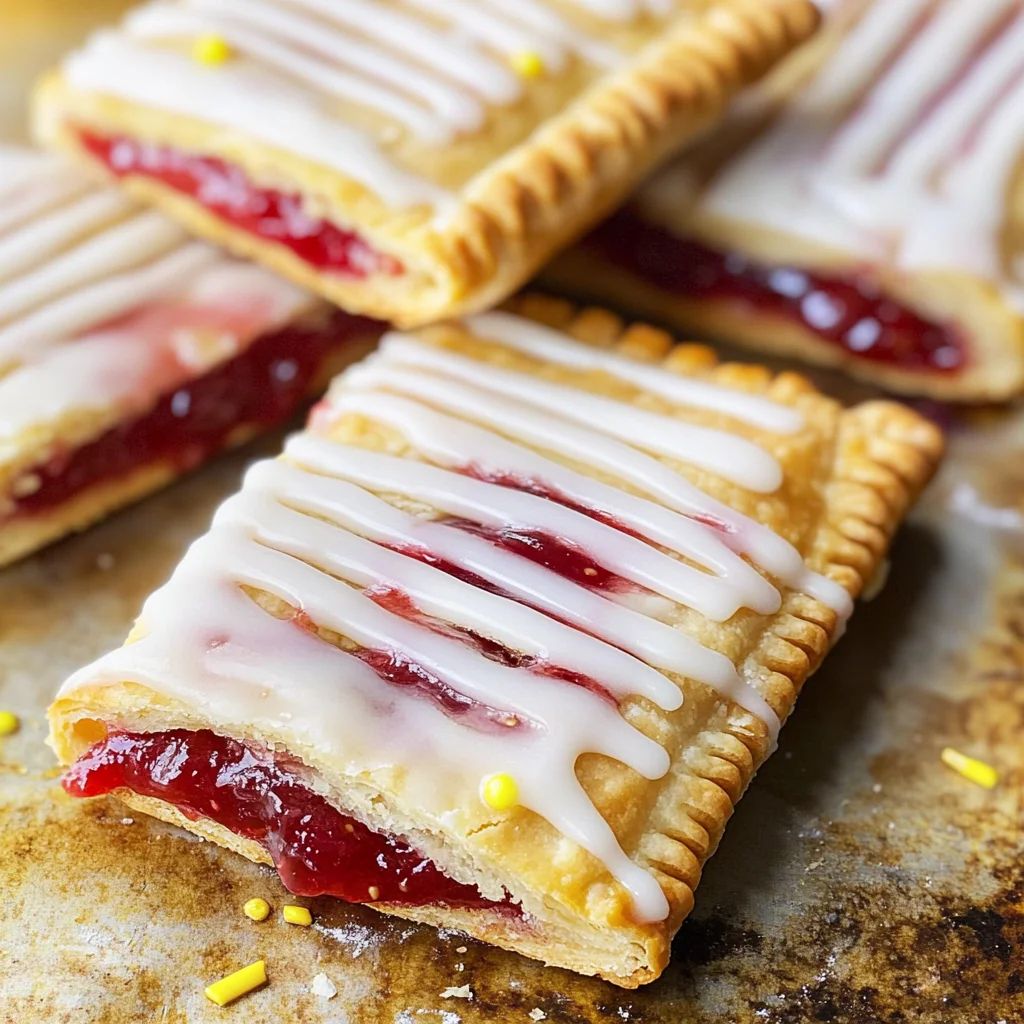
Step 5: Make the Glaze
- In a small bowl, combine powdered sugar, vanilla extract, and water until smooth.
- Drizzle over cooled pop tarts after they’ve baked and cooled slightly.
Enjoy your homemade Gluten-Free Pop Tarts as a tasty breakfast option or dessert treat!
How to Serve Gluten-Free Pop Tarts
Homemade gluten-free pop tarts are a delightful treat that can be enjoyed in various ways. Here are some serving suggestions to enhance your experience.
Pair with Fresh Fruit
- Serve alongside a mix of seasonal berries for a refreshing contrast.
- Add sliced bananas or apples to create a more filling breakfast option.
Enjoy with Coffee or Tea
- Pair your pop tarts with a hot cup of coffee for a classic morning pick-me-up.
- Complement them with herbal tea for a soothing afternoon snack.
Dip in Yogurt
- Serve with a side of dairy-free yogurt for dipping, adding creaminess and flavor.
- Choose flavored yogurt to match or contrast the sweetness of the pop tarts.
Top with Ice Cream
- For dessert, serve warm gluten-free pop tarts topped with dairy-free ice cream.
- Drizzle chocolate or caramel sauce over the top for extra indulgence.
How to Perfect Gluten-Free Pop Tarts
To achieve the best results when making gluten-free pop tarts, consider these helpful tips.
- Chill Your Ingredients: Keep butter and shortening very cold; this helps create that flaky texture.
- Use Quality Flour: Choose a good gluten-free all-purpose flour blend for optimal taste and texture.
- Roll Evenly: Roll out the dough evenly to ensure uniform baking and prevent burning on the edges.
- Seal Well: Press down firmly on the edges before baking to seal in the filling and avoid leakage.
- Monitor Baking Time: Keep an eye on them while baking; they should be golden brown but not overcooked.
Best Side Dishes for Gluten-Free Pop Tarts
Gluten-free pop tarts can be complemented by various side dishes that enhance their taste and make your meal more balanced. Here are some great options:
- Fresh Fruit Salad: A colorful mix of fruits provides vitamins and freshness.
- Greek Yogurt Parfait: Layering yogurt with granola and fruit makes a satisfying side.
- Smoothie Bowl: Blend your favorite fruits into a smoothie bowl topped with nuts or seeds.
- Nut Butter Toast: Spread almond or peanut butter on gluten-free toast for added protein.
- Cottage Cheese: A scoop of cottage cheese is rich in protein and pairs well with sweet pastries.
- Veggie Sticks: Crunchy vegetables like carrots and cucumbers add crunch and balance to your meal.
- Chia Pudding: Prepare chia pudding in advance for a nutritious, creamy side dish.
Common Mistakes to Avoid
Making gluten-free pop tarts can be a delightful experience, but some common mistakes can ruin the final product. Here are some pitfalls to watch out for:
- Using the wrong flour blend: Not all gluten-free flours work the same. Ensure you use a gluten-free all-purpose rice flour blend that contains xanthan gum for best results.
- Skipping the chilling step: If you don’t chill your pastry, it can become too soft and unmanageable. Always refrigerate the dough for at least 30 minutes before rolling it out.
- Overfilling the tarts: Adding too much filling may cause your pop tarts to burst during baking. Stick to the recommended amount of jam for a perfect seal.
- Not sealing edges properly: Be sure to crimp or press down the edges of your pop tarts well. This prevents filling from leaking out during baking.
- Ignoring baking times: Every oven is different. Check your pop tarts a few minutes before the recommended time to avoid overbaking.
Storage & Reheating Instructions
Refrigerator Storage
- Store in an airtight container.
- Pop tarts will stay fresh for up to 5 days in the refrigerator.
Freezing Gluten-Free Pop Tarts
- Wrap each pop tart individually in plastic wrap.
- Place them in a freezer-safe bag or container.
- They can be frozen for up to 3 months.
Reheating Gluten-Free Pop Tarts
- Oven: Preheat to 350°F (175°C) and heat for about 10 minutes for a crispy texture.
- Microwave: Heat one pop tart on high for about 15-20 seconds, but this may make them softer.
- Stovetop: Place in a skillet over low heat, flipping occasionally until warmed through.
Frequently Asked Questions
What are Gluten-Free Pop Tarts made of?
Gluten-free pop tarts are made using a gluten-free all-purpose rice flour blend, butter or shortening, eggs, and fruit jam filling, making them both delicious and safe for those avoiding gluten.
How do I know if my Gluten-Free Pop Tarts are done baking?
Your gluten-free pop tarts are done when they turn golden brown on top and feel firm to the touch. Start checking them around the 15-minute mark.
Can I customize my Gluten-Free Pop Tarts?
Absolutely! You can fill them with different jams or even nut butters for variety. Experiment with flavors like raspberry or blueberry!
How long do homemade Gluten-Free Pop Tarts last?
Homemade gluten-free pop tarts can last up to 5 days in the refrigerator or up to 3 months in the freezer if stored properly.
Final Thoughts
These homemade gluten-free pop tarts are not only nostalgic but also versatile enough to suit various tastes. With simple adjustments, you can create different flavors that cater to your preferences. Give this recipe a try and enjoy the sweet satisfaction of baking your own treats!
Did You Enjoy Making This Recipe? Please rate this recipe with ⭐⭐⭐⭐⭐ or leave a comment.
📖 Recipe Card
Print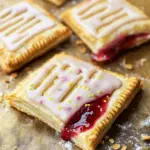
Gluten-Free Pop Tarts
- Total Time: 50 minutes
- Yield: Makes approximately 8 pop tarts 1x
Description
Indulge in the delightful nostalgia of homemade Gluten-Free Pop Tarts, perfect for breakfast or as a sweet snack. These tasty pastries feature a flaky gluten-free crust filled with luscious strawberry jam and drizzled with a creamy vanilla glaze. Easy to make and customizable, these pop tarts are sure to please everyone from kids to adults. With simple ingredients and straightforward steps, you’ll enjoy the satisfaction of creating your own delicious treats that cater to dietary needs without sacrificing flavor.
Ingredients
- 2 3/4 cup gluten-free all-purpose rice flour blend with xanthan gum
- 1/4 cup granulated sugar
- 1/2 teaspoon salt
- 1/2 cup very cold unsalted butter (dairy-free use Smart Balance butter)
- 1/2 cup very cold shortening
- 16 teaspoon gluten-free seedless strawberry jam
- 1 large egg
- 1 tablespoon water
- 1 cup powdered sugar
- 1/4 teaspoon pure vanilla extract
- 2 tablespoons water
Instructions
- In a mixing bowl, combine gluten-free flour, sugar, and salt. Cut in cold butter and shortening until crumbly.
- Whisk together egg and apple cider vinegar; add to the flour mixture. Gradually mix in ice-cold water until a dough forms. Chill for 30 minutes.
- Preheat oven to 375°F (190°C). Roll out half the chilled dough to 1/8-inch thickness and cut into rectangles.
- Place 2 teaspoons of strawberry jam on half of the rectangles, moisten edges with egg wash, top with remaining rectangles, and crimp edges.
- Bake for 20 minutes or until golden brown. Make glaze by mixing powdered sugar, vanilla extract, and water; drizzle over cooled pop tarts.
- Prep Time: 30 minutes
- Cook Time: 20 minutes
- Category: Dessert
- Method: Baking
- Cuisine: American
Nutrition
- Serving Size: 1 serving
- Calories: 200
- Sugar: 12g
- Sodium: 150mg
- Fat: 9g
- Saturated Fat: 4g
- Unsaturated Fat: 5g
- Trans Fat: 0g
- Carbohydrates: 30g
- Fiber: 1g
- Protein: 2g
- Cholesterol: 30mg